Overview
In the instruction area you will find all handouts, user manuals and documentation related to the service.
Documentation (PDF)
Filling out instructions for scans
- Use blue or black ballpoint pens
-
The sheets are scanned in black and white. Pen colors that are too light are not recognized. Therefore the sheets may only be filled in with a blue or black ballpoint pen or a thin black felt-tip pen.
A pen that is too thick leads to a too high degree of blackening, which would be recognized as a correction.
ATTENTION! Also the correctors must not use a red pen!
- Crossings in box
-
Mark your answer like this:

Crosses can only be recognized within a box. Crosses that only touch the box or are placed in such a way that they do not produce any blackening in the box cannot be detected.
- Make corrections
-
Correct your answer like this:

Blackened boxes can be used for correction.
- Clearly mark the matriculation number
-
Answer sheet: Each digit of the matriculation number must be marked correctly in the matrix.
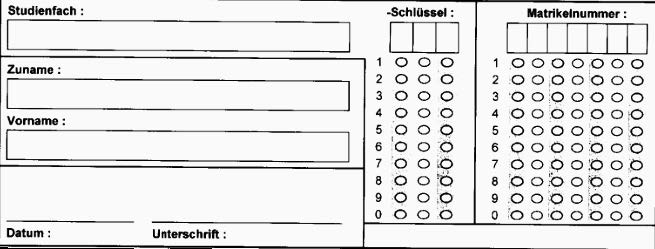
The automatic reading of the matriculation number takes place exclusively via this checkbox battery. In order for a visual correction to be possible, the student must also enter his or her numerical student number and name in the fields provided.
Combined Question and Answer Sheet (EvaExam): Each digit of the student number (student ID) must be correctly marked in the matrix.
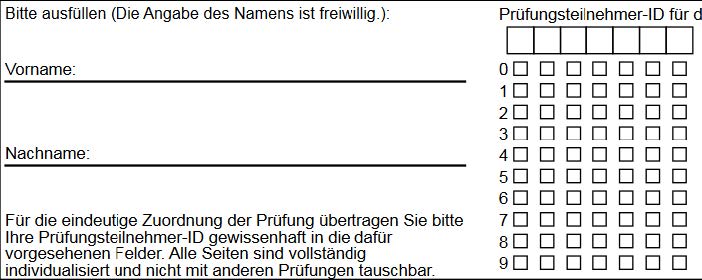
The automatic reading of the matriculation number takes place exclusively via this checkbox battery. In order for a visual correction to be possible, the student must also enter his or her numerical student number and name in the fields provided.
- Keep corner marking and barcode free Combined question and answer sheet (EvaExam)
-
Under no circumstances should the subject write in the barcode (bottom centre) or over the four corner markings. Writing or other blackening (coffee stains, etc.) above these central detection elements may cause the sheet to be illegible.

Printing instructions for answer sheets
- Print participant forms
-
Print slightly more examination sheets than there are candidates registered for the examination. Participant sheets can be reprinted without any problems.
- Printing Solution Sheets
-
Print as many solution sheets as there are exam versions. On an answer sheet there is a note under the head with name and matriculation number
*** SOLUTION TEMPLATE ***.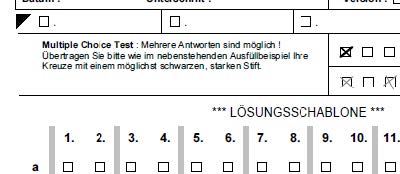
Look out! Solution sheets cannot be evaluated as participant sheets. Do not confuse them.
- Check print result
-
Make sure that the printed image is clean, clear and strong without distortion.
Tip: hold against the light and see if the front and back are on top of each other.
- Avoid or remove staples
-
Avoid stapling with staples if possible, as they can lead to bent and damaged corners. If used - remove all staples or paper clips before scanning!
- Avoid coloured paper
-
Colored paper can cause the scanned images to appear darker, which can negatively affect the recognition process.
- Do not use recycled paper
-
The irregularities in the environmental paper can lead to misidentifications. The paper irregularities may be located in checkboxes by chance and appear in the scanned image as blackening and thus as a supposed check mark.
Printing instructions for combined question and answer sheets (EvaExam)
- Generate test sheets
-
The EvaExam test sheets must be generated in EvaExam!
When creating the exam you can indicate how many sheets you will probably need.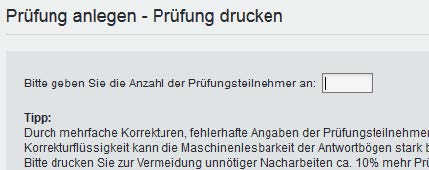
If you require further test sheets, you can generate them later. To do this, click on the exam and enter the desired number of exam sheets under Actions > Generate additional exam sheet sets.

- Print test sheets
-
Make sure that the printed image is clean, clear and strong without distortion.
Tip: hold against the light and see if the front and back are on top of each other.
- Avoid or remove staples
-
Avoid stapling with staples if possible, as they can lead to bent and damaged corners. It is better to use paper clips, which can be easily removed before scanning, or separator sheets of colored paper. If you need to staple your sheet sets, print the sheets slightly smaller so that the staples do not damage the corner angles. However, make sure that the reduction in size does not distort the sheets and be sure to test the reading results by making a test scan.
All staples or paper clips must be removed before scanning!
Translated with www.DeepL.com/Translator (free version)
- Avoid coloured paper
-
Colored paper can make the scanned images appear darker, which can negatively affect the recognition process.
In some cases it may be useful to print individual pages on coloured paper, e.g. the first page of a test sheet, so that sets of sheets can be easily separated. In this case, however, make sure to test the reading results beforehand by making a test scan and use only light coloured paper in pastel shades.
- Do not use recycled paper
-
The irregularities in the environmental paper can lead to misidentifications. The paper irregularities may be located in checkboxes by chance and appear in the scanned image as blackening and thus as a supposed check mark.


